
Simple nail art is the most searched nail category on Pinterest — and the reason is obvious. Most women want polished, intentional nails without booking a salon appointment or buying 20 tools. This guide walks you through 19 simple nail art designs any beginner can do at home with minimal tools. For more beauty direction, our how to find your personal style guide is a great companion read.
Dot Tool Simple Nail Art
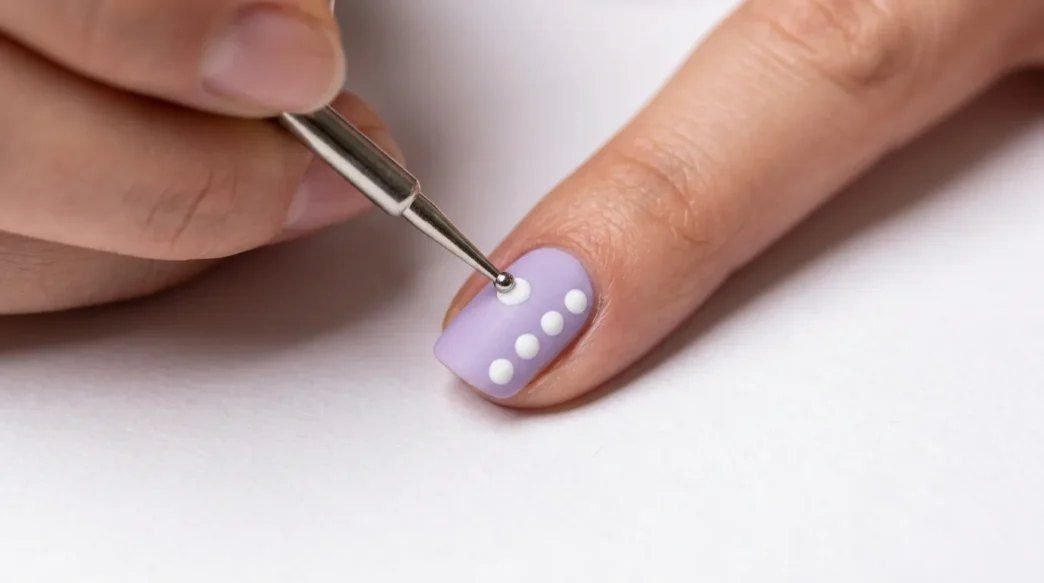
These three looks use a dotting tool — the most basic nail art tool. They are the easiest designs on the list.
1. The Single Dot Accent
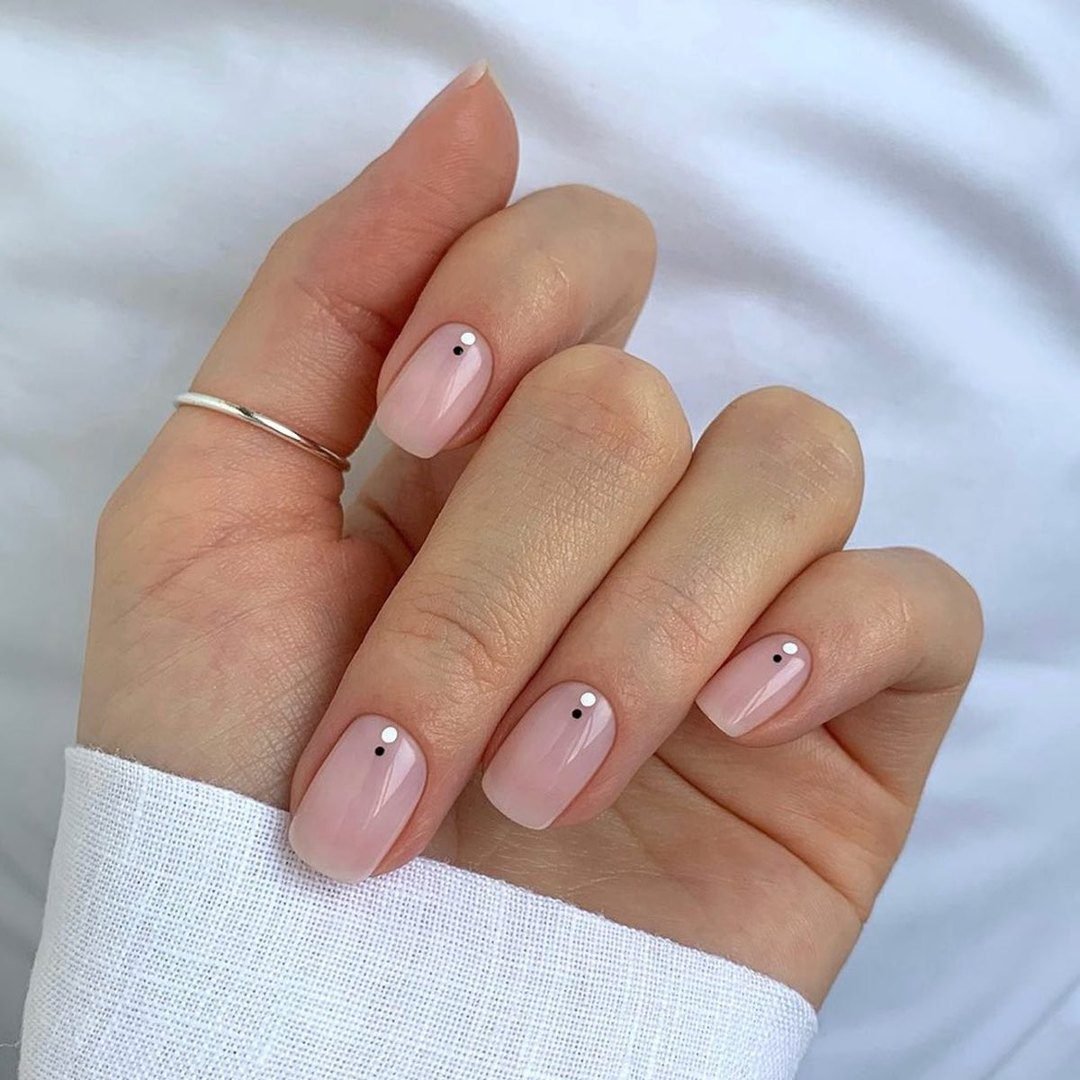
A solid color on all nails, with a single white dot on each ring finger. This is the most iconic of all simple nail art looks — it takes 30 seconds and looks intentional. For more on minimal nails, our elegant nails guide is a great companion read.
If you’re in the mood for something a little different, these nail extensions are a beautiful place to start.
Steps: Paint all nails in your base color. Dip a dotting tool in white polish. Press one dot onto each ring finger.
2. The Polka Dot Cluster

A solid color base with a small cluster of three dots on each nail. This simple nail art look is the most playful — polka dots read as cute and fun. For more on dots, our polka dot nails art tutorial guide is essential reading.
Steps: Paint all nails in your base color. Dip a dotting tool in a contrasting color. Press three dots in a triangle cluster on each nail.
3. The Gradient Dots
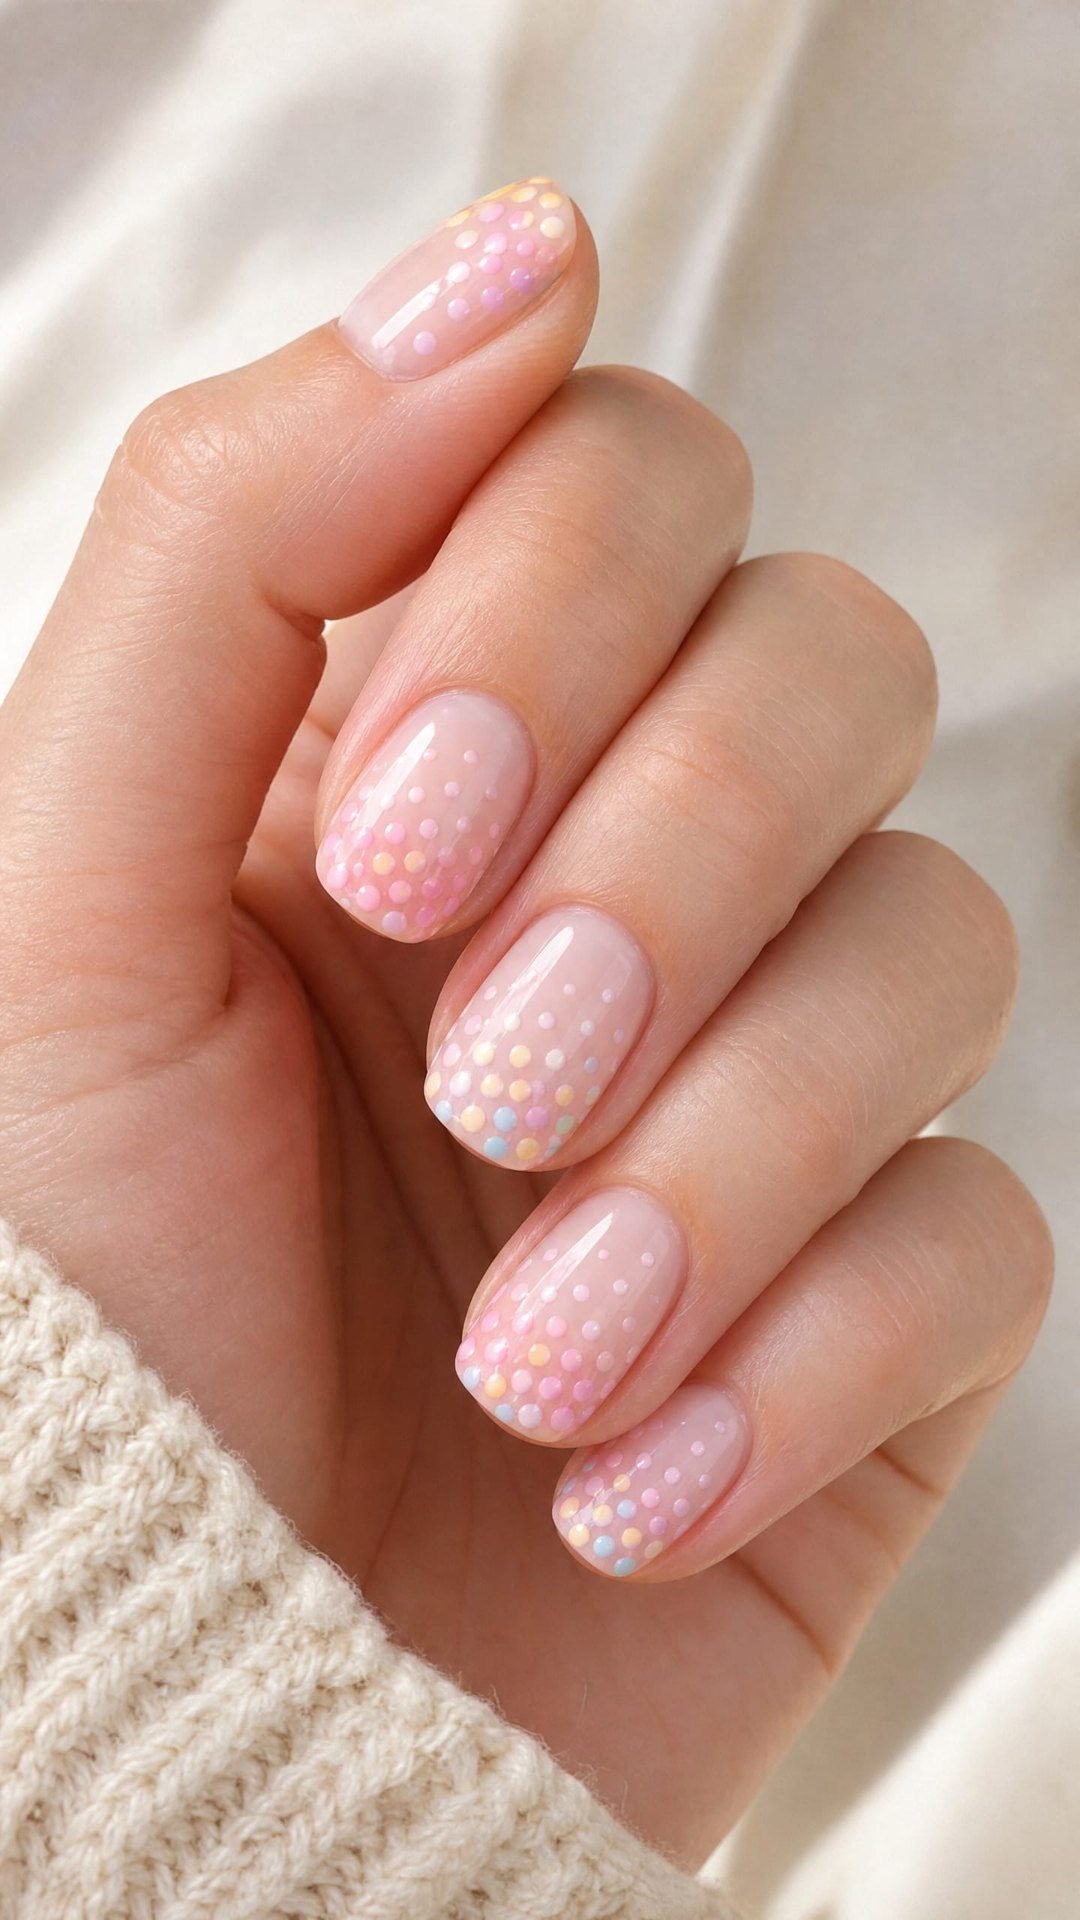
A solid color base with dots that fade from large to small down the nail. This simple nail art look is the most modern — gradient dots read as fashion-forward. For more on modern nails, our natural nails guide is worth a read.
Steps: Paint all nails in your base color. Use three dotting tool sizes. Press large dots at the cuticle, medium in the middle, small at the tip.
Tape Simple Nail Art

These three looks use striping tape — a $3 tool that creates crisp lines. They are perfect for graphic designs.
4. The Half-Moon Manicure
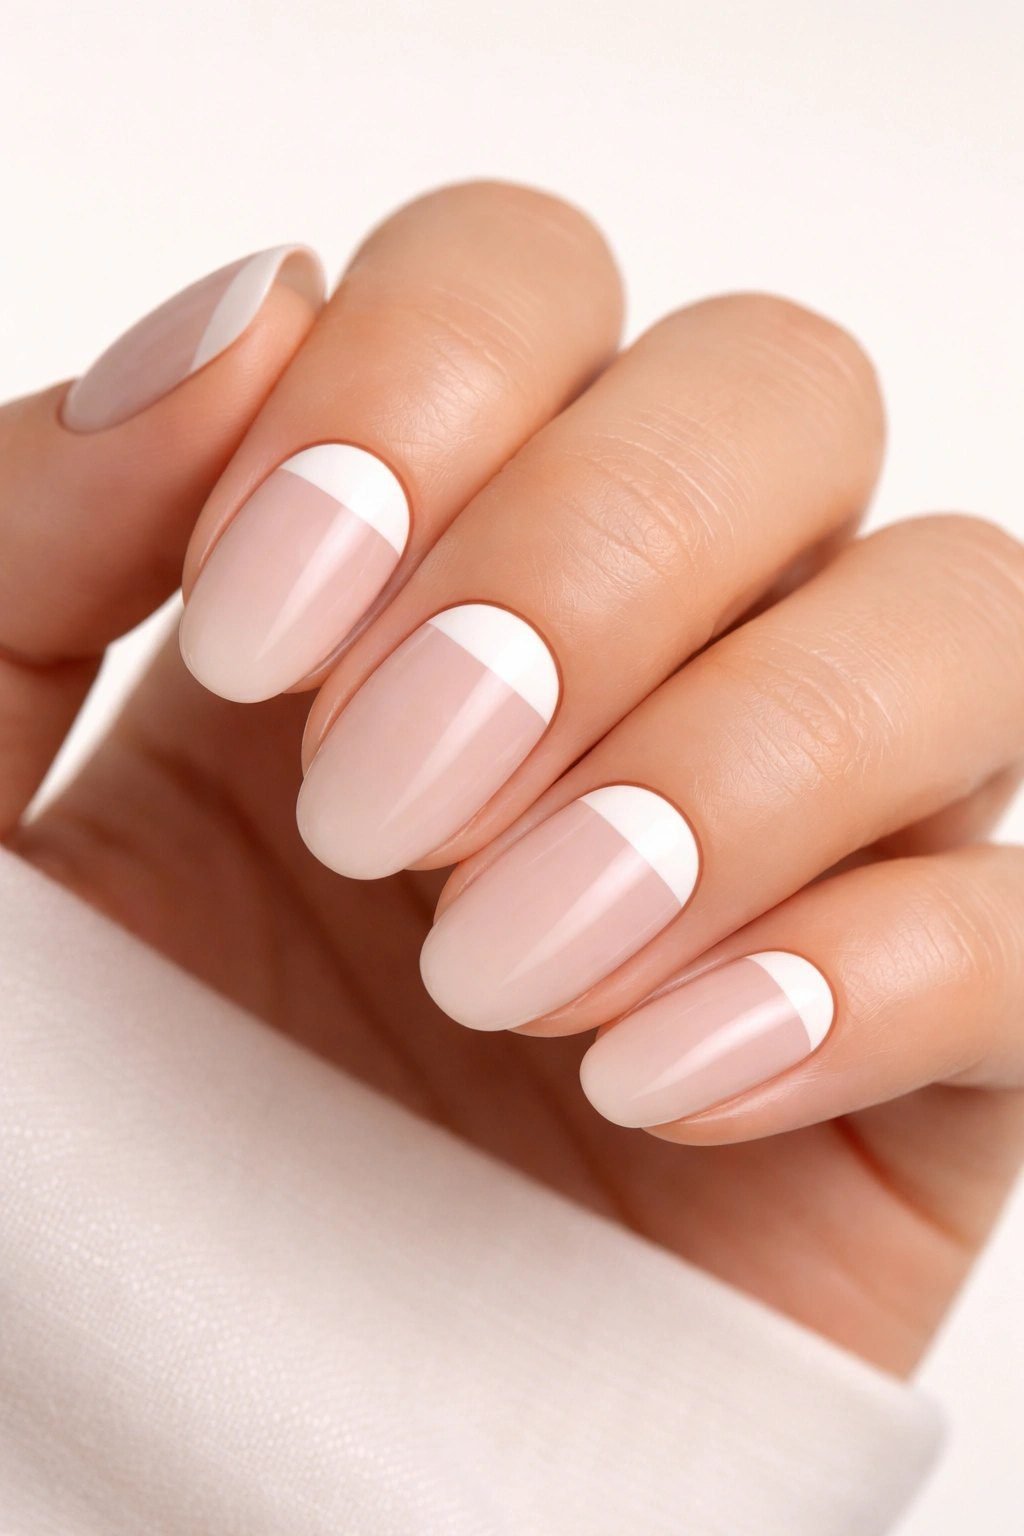
A half-moon shape at the cuticle in a contrasting color. This simple nail art look is the most elegant — half-moons read as polished and intentional. For more on elegant nails, our old money nails guide is worth a read.
Steps: Paint all nails in your base color. Place hole reinforcers at the cuticle. Paint the exposed half-moon in a contrasting color. Remove reinforcers.
5. The Stripe Accent

A solid color base with a single thin stripe down the center of each nail. This simple nail art look is the most graphic — stripes read as modern and bold. For more on stripes, our nails black and white guide is worth a read.
Steps: Paint all nails in your base color. Place striping tape down the center. Paint over the tape in a contrasting color. Remove tape.
6. The Negative Space Stripe

A bare nail with a single thin stripe down the center. This simple nail art look is the most editorial — negative space reads as fashion-forward. For more on nail art, our nail art guide has ideas.
Steps: Apply a clear base coat. Place striping tape down the center. Paint over the tape in your chosen color. Remove tape.
French Tip Simple Nail Art

These three looks use the French tip technique — the most classic simple nail art. For more French inspiration, our french tip nail ideas guide is essential reading.
7. The Micro French Tip

A micro-thin white tip on a sheer pink base. This simple nail art look is the most modern take on the French — the micro tip reads as intentional. For more on modern nails, our almond nail designs guide is worth a read.
Steps: Paint all nails in a sheer pink. Use a striping brush to paint a micro-thin white line at the tip. Seal with a top coat.
8. The Colored French Tip
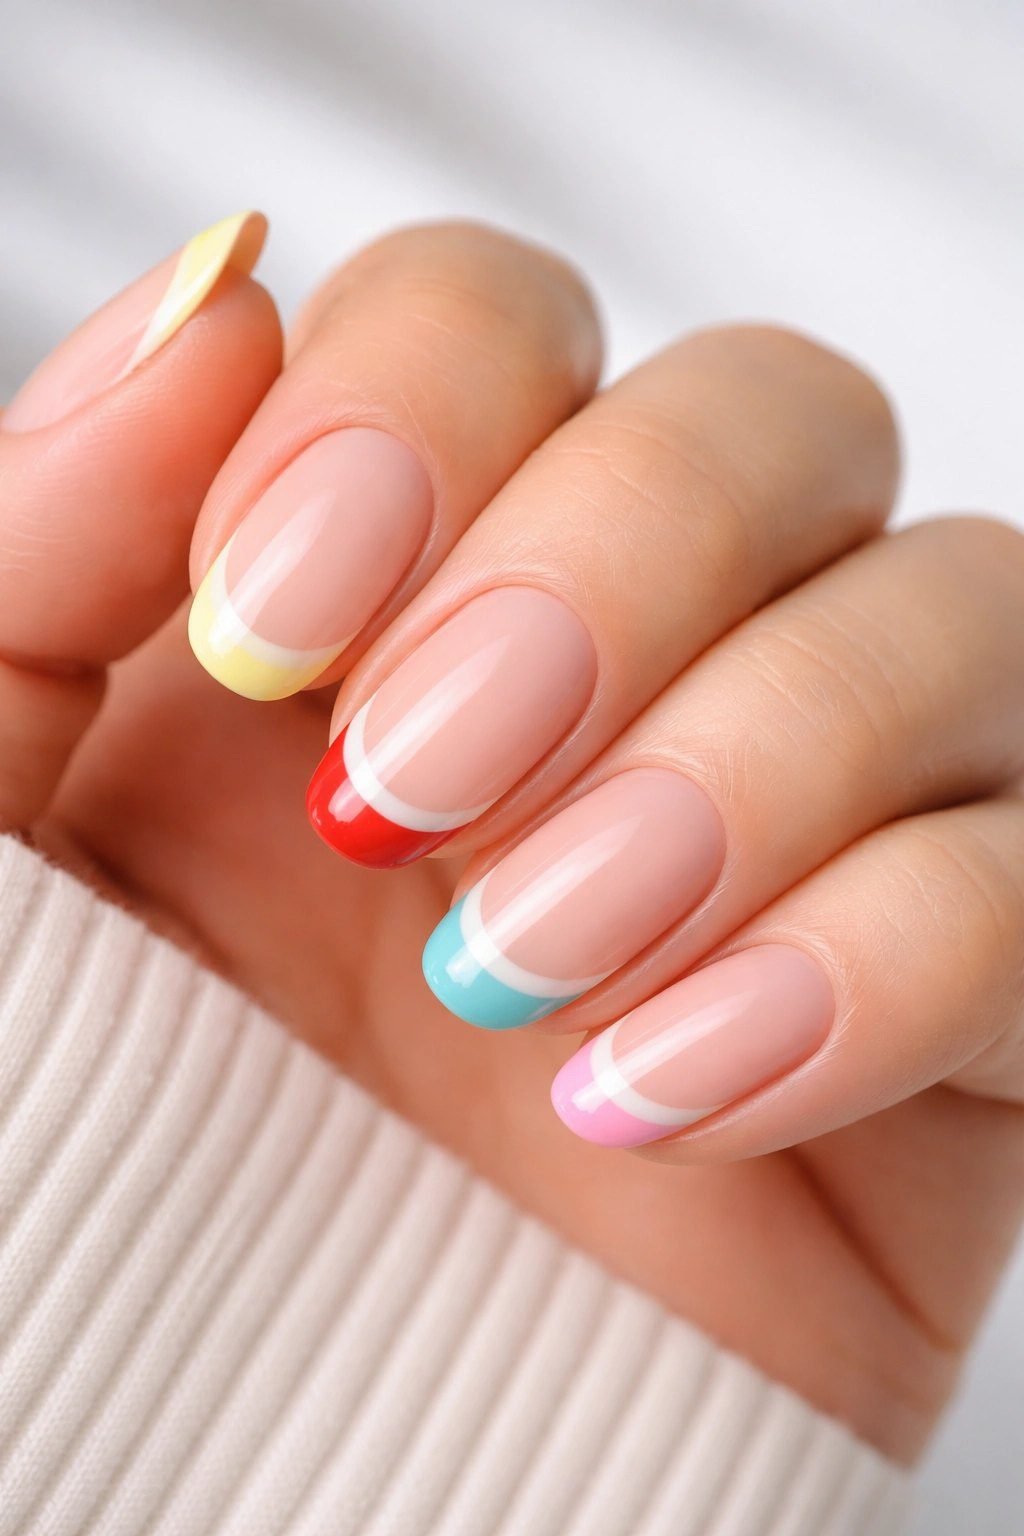
A colored tip (red, blue, or black) on a sheer pink base. This simple nail art look is the most playful — colored tips add personality without overwhelming. For more on color, our nail polish colors guide has polish ideas.
Steps: Paint all nails in a sheer pink. Use a striping brush to paint a colored line at the tip. Seal with a top coat.
9. The Double French Tip

Two thin lines at the tip — one white, one colored. This simple nail art look is the most unexpected — the double tip reads as fashion-forward. For more on French, our short nail designs guide is worth a read.
Steps: Paint all nails in a sheer pink. Paint a thin white line at the tip. Paint a thin colored line above it.
Minimalist Accent Simple Nail Art

These three looks use small accents to elevate a basic manicure. They are perfect for beginners.
10. The Single Stripe Accent

A solid color on all nails, with a single thin stripe on each ring finger. This simple nail art look is the most modern — the single stripe reads as intentional. For more on stripes, our nail art guide has ideas.
Steps: Paint all nails in your base color. Place striping tape on each ring finger. Paint over the tape in a contrasting color. Remove tape.
11. The Negative Space Heart

A bare nail with a small heart shape on each ring finger. This simple nail art look is the cutest — the heart reads as sweet and intentional. For more on cute nails, our nails for school guide has principles that apply.
Steps: Apply a clear base coat. Use a dotting tool to press two dots side by side. Drag the dots down to form a heart.
12. The Single Star Accent

A solid color on all nails, with a single small star on each ring finger. This simple nail art look is the most playful — the single star reads as cute. For more on stars, our aura nails guide has principles that apply.
Steps: Paint all nails in your base color. Use a striping brush to paint a small star on each ring finger.
Ombré Simple Nail Art

These three looks use the sponge technique — the easiest way to create a gradient. They are perfect for soft, romantic nails.
13. The Pink Ombré

A sheer pink base that fades into a bright pink tip. This simple nail art look is the most romantic — pink ombré reads as soft and feminine. For more on ombré, our ombre nails ideas guide is essential reading.
Steps: Paint all nails in a sheer pink. Dab bright pink polish on a makeup sponge. Press the sponge onto the tip of each nail.
14. The White Ombré
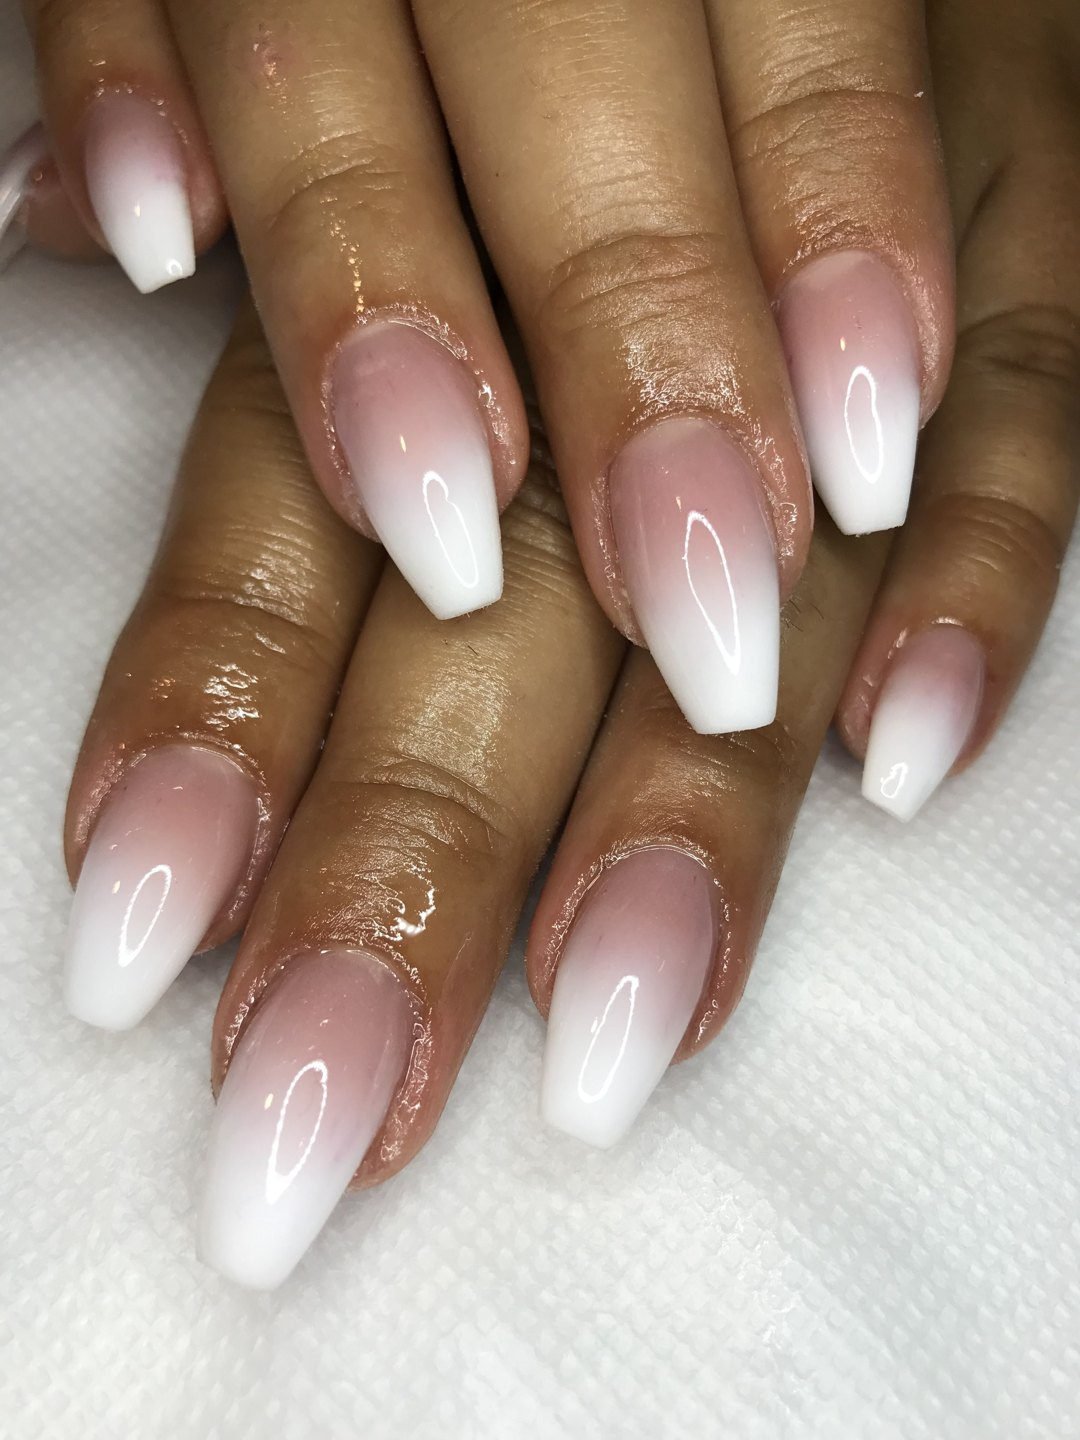
A sheer pink base that fades into a white tip. This simple nail art look is the most elegant — white ombré reads as polished and timeless. For more on white, our milky white nails guide is worth a read.
Steps: Paint all nails in a sheer pink. Dab white polish on a makeup sponge. Press the sponge onto the tip of each nail.
15. The Glitter Ombré

A sheer pink base that fades into a glitter tip. This simple nail art look is the most photogenic — glitter ombré catches light beautifully. For more on glitter, our gold nails guide is worth a read.
Steps: Paint all nails in a sheer pink. Dab glitter polish on a makeup sponge. Press the sponge onto the tip of each nail.
Stamp Simple Nail Art

These two looks use nail stamps — a $5 tool that creates perfect designs. They are the easiest way to do detailed nail art.
16. The Floral Stamp
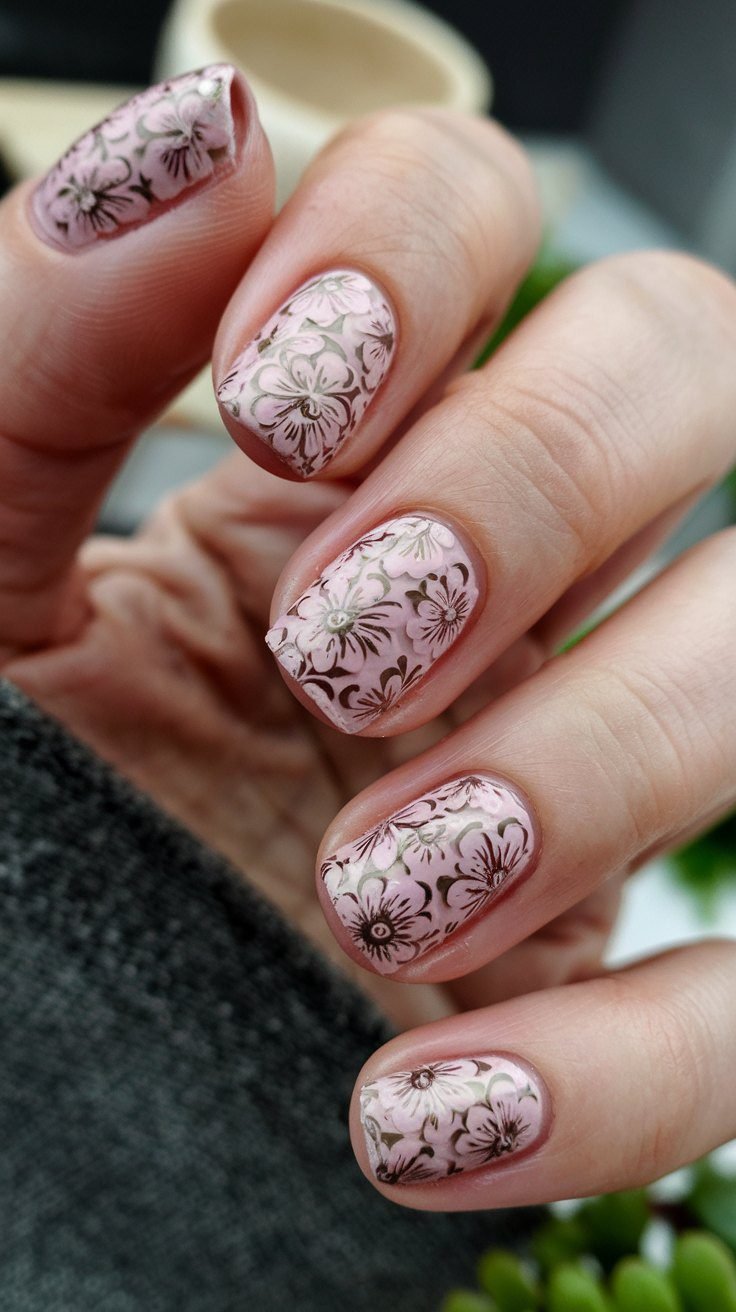
A solid color base with a small floral stamp on each ring finger. This simple nail art look is the most romantic — florals read as soft and feminine. For more on florals, our nails with flowers guide is worth a read.
Steps: Paint all nails in your base color. Apply polish to a floral stamp. Press the stamp onto each ring finger.
17. The Geometric Stamp

A solid color base with a small geometric stamp on each ring finger. This simple nail art look is the most modern — geometric shapes read as fashion-forward. For more on geometric nails, our aura nails guide has principles that apply.
Steps: Paint all nails in your base color. Apply polish to a geometric stamp. Press the stamp onto each ring finger.
One-Stroke Simple Nail Art

These two looks use a single stroke of polish — the easiest nail art technique. They are perfect for true beginners.
18. The Half-Moon Stroke

A solid color base with a single half-moon stroke at the cuticle. This simple nail art look is the most elegant — the half-moon reads as polished. For more on elegant nails, our classy red nails guide is a great companion read.
Steps: Paint all nails in your base color. Load a striping brush with a contrasting color. Press the brush at the cuticle in a curved stroke.
19. The Diagonal Stroke

A solid color base with a single diagonal stroke across each nail. This simple nail art look is the most graphic — the diagonal reads as modern. For more on modern nails, our nail ideas guide is worth a read.
Steps: Paint all nails in your base color. Place striping tape diagonally across each nail. Paint over the tape in a contrasting color. Remove tape.
What Makes Simple Nail Art So Popular

Simple nail art works because it is achievable — anyone can do it at home with minimal tools. The best looks use a dotting tool, striping tape, and a steady hand. Once you master these three tools, you can create dozens of simple nail art designs. For more on building a nail wardrobe, our nail care routine guide is essential reading.
Simple Nail Art Mistakes to Avoid
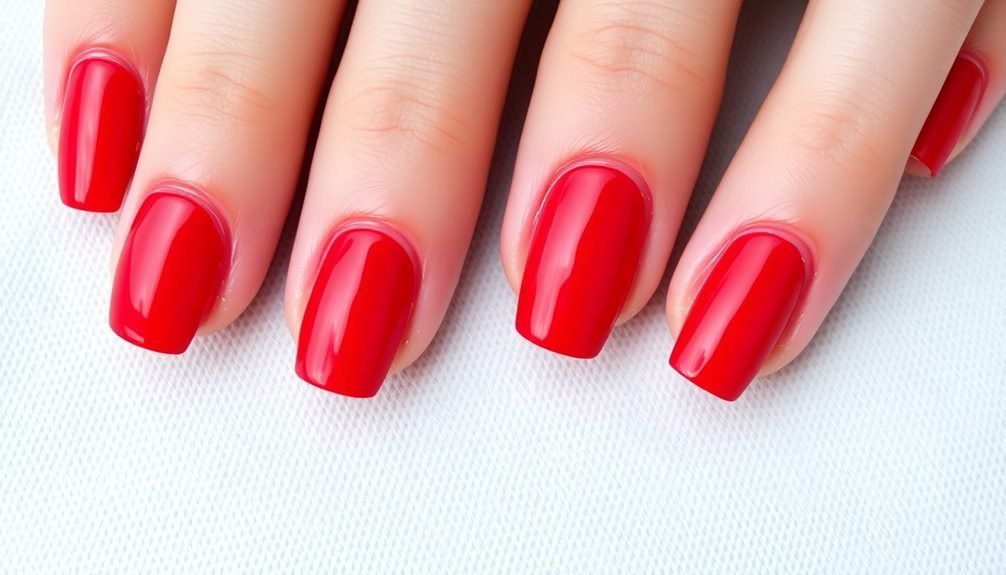
The biggest simple nail art mistake is using nail polish as paint. Nail polish is too thick for detail work — use acrylic paint or nail art paint instead. Another common mistake is skipping the top coat — a top coat seals the design and prevents chipping. For more on top coats, our gel nail designs guide has principles that apply.
And if you’re collecting ideas for later, these nail korean style deserve a spot on your list.
Using the wrong brush is another mistake. Striping brushes create thin lines; dotting tools create dots; detail brushes create small shapes. Use the right tool for the design. Finally, avoid rushing — simple nail art requires patience. Let each layer dry before adding the next. For more on nail health, our acrylic vs gel nails guide has principles that apply.
For fresh ideas every day, follow Daily Juggar on Pinterest and Facebook.
Simple Nail Art FAQ

What is simple nail art? Simple nail art is nail design that any beginner can do at home with minimal tools. The best simple nail art uses a dotting tool, striping tape, and a steady hand. It looks intentional but requires no advanced skills. For more inspiration, our how to find your personal style guide is worth a read.
What tools do I need for simple nail art? The essentials are a dotting tool, striping tape, a striping brush, and a detail brush. These four tools cost under $15 and can create hundreds of designs. Add nail art paint for detail work. For more on tools, our nail care routine guide has principles that apply.
How long does simple nail art last? Simple nail art lasts 5 to 7 days with regular polish, and 2 to 3 weeks with gel. To extend the life of your design, apply a top coat every two days and wear gloves when washing dishes. For more on longevity, our gel nail designs guide is essential reading.
Can I do simple nail art on short nails? Yes — simple nail art works beautifully on short nails. Choose small designs (dots, thin stripes, single accents) that fit on a short nail bed. Avoid large designs, which overwhelm short nails. For more on short nails, our short nail designs guide is essential reading.
What is the easiest nail art for beginners? The single dot accent is the easiest nail art for beginners — it takes 30 seconds and requires only a dotting tool. The polka dot cluster and the micro French tip are also easy beginner designs. For more on beginner nails, our minimalist makeup routine guide has principles that apply.
Ready to Master Simple Nail Art

Simple nail art is not about giving up on style — it is about finding designs you can actually do at home. Whether you start with a single dot or go full ombré, the key is patience, the right tools, and a confident attitude. Happy painting, and may your simple nail art turn heads everywhere.