
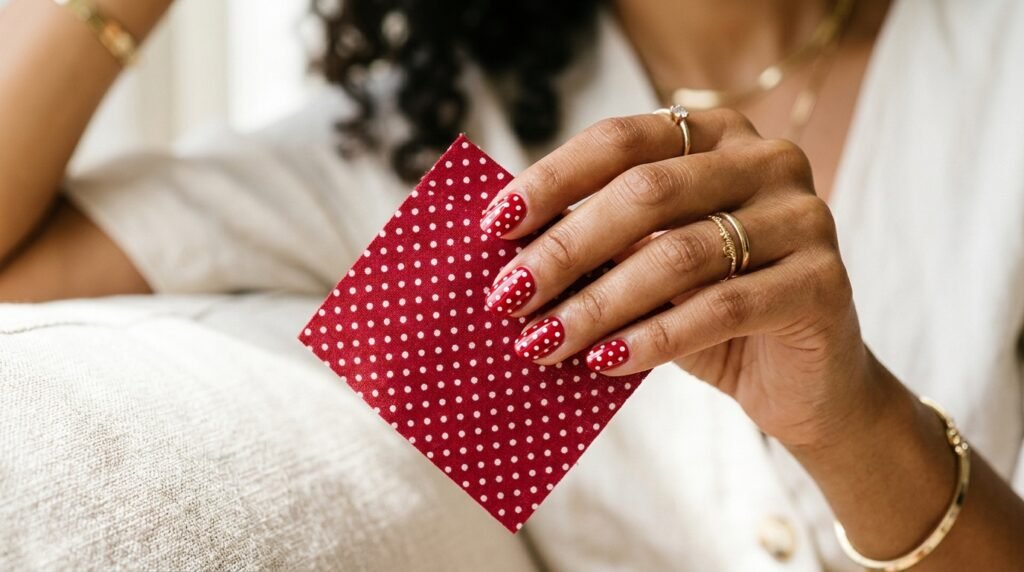

Polka dot nails fail for one reason — everyone tries to paint circles.
Circles are the hardest shape to hand-paint. The dots you meant to draw come out as ovals, blobs, and smudges, and the design that looked easy on Pinterest becomes the manicure you remove in shame.
Here is what the tutorials skip: polka dots are not painted — they are pressed. A toothpick or dotting tool dipped in polish and touched to the nail deposits a perfect circle instantly. No drawing. No steady hand. The polish does the shaping; the tool does the placing; you just decide where.
This is the dot tutorial that changes the skill level from artist to everyone — the sizes decoded, the ten designs, and the pressure trick that makes every dot round.
The circle was never yours to draw. It was yours to press.
Follow our Pinterest boards for daily nail tutorials, and join us on Facebook so you never miss a technique guide.
The 30-Second Answer (Save This)

What are polka dot nails? A manicure built from pressed dots of polish — made with a dotting tool, toothpick, or bobby pin instead of brushes.
What you need: two polish colors, a toothpick or bobby pin, topcoat. The kit costs zero dollars — everything is already in your drawer.
The time: ten to fifteen minutes for a full design.
The skill: pressing, not painting. If you can touch paper with a pencil, you can do this.
Now the technique that makes every dot round.
The Press Method (The Whole Tutorial)
Five steps, one physics lesson.
Step 1: paint the base color on all nails. Full dry — not tacky. The dots need a solid floor.
Step 2: place a drop of the dot color on foil or paper — a little pool to dip from.

Step 3: dip the toothpick tip or bobby pin head into the drop — enough polish to coat the tip.
Step 4: touch the nail where the dot goes. One press, straight down, straight up. Do not drag, do not swirl — the touch deposits a circle by itself.

Step 5: repeat, wipe the tool between dots, and topcoat when all dots are dry.
The physics secret: a round tool touching a flat surface deposits a round drop. The circle is geometry, not artistry — which is why this method cannot fail the way painting fails.
The Dot Size Dial (Micro to Macro)
The tool tip decides the dot — four sizes, four looks.
Micro dots (toothpick tip): 1mm dots — the polka-dot texture, the dotted-lines, the delicate details. Tiny but transformative in groups.
Mini dots (bobby pin head): 2-3mm dots — the classic polka dot size. The standard that most designs in this guide use.
Medium dots (dotting tool large end): 4-5mm dots — the statement dots, the accent features, the dots that read as design elements.
Macro dots (bobby pin side or brush handle): 6mm+ dots — the single giant dots, the feature circles.
The size rule: one design, one to two dot sizes. Three sizes on one nail reads confetti; two sizes read designed.
Design 1: The Classic Uniform Grid

The original — evenly spaced dots in rows across every nail. White dots on red, black on white, cream on burgundy.
The grid secret: start with a center dot, then build outward in even rows. The first dot anchors the whole grid — and the uniform spacing is what separates polka from sprinkle.
Design 2: The Random Scatter

Dots scattered organically — no grid, no pattern, just dots falling where they fall. The confetti energy, the modern read.
The scatter secret: random needs density balance — enough dots to read as pattern, few enough to read as choice. Ten to twelve dots per nail is the zone.
Design 3: The Accent Dot Nail
Nine solid nails, one dotted accent per hand. The polka dot as a feature instead of a theme.
The beginner’s favorite: one accent nail is where everyone should start — the design reads complete at one-tenth the effort.
Design 4: The Micro-Dot Texture Field

Toothpick-tip micro dots covering the whole nail densely — the texture read, the almost-fabric look.
The micro magic: dense micro dots read as texture instead of pattern — the nail that looks woven. Our easy halloween nails at home guide’s ghost dots were the micro technique in costume form.
Design 5: The Gradient Dot Fade

Dots in decreasing sizes and density — macro at the tip fading to micro at the cuticle. The dot version of the ombré.
The fade build: start with medium dots at the tip, shrink and space them toward the cuticle. The gradient made of circles — no sponge needed.
Design 6: The Dot French Tip

The french tip rebuilt in dots — micro dots clustered at the tip line instead of a painted edge.
The dot french advantage: no tip-painting skill needed. The dotted edge reads french from a distance and texture up close — the design from our french tip nail ideas 2026 guide’s easiest cousin.
Design 7: The Heart of Dots

Micro dots arranged into a heart shape on accent nails — the dot-built motif, Valentine’s-ready and sweet year-round.
The build: draw the heart outline mentally, place dots along it, fill the inside. The outline-first method keeps the shape readable.
Design 8: The Polka Dot French Hybrid
Grid dots at the tips over solid nails — halfway between the french and the full grid. The hybrid that reads pattern at the edge and calm at the base.
Design 9: The Double-Sized Play

Mini dots as the background field, one medium dot per nail as the feature — the dot-in-dot design where one circle is the story.
The feature rule: the medium dot sits center-nail, in a contrasting color — one feature dot per nail, the design’s single focal point.
Design 10: The Checkerboard of Dots

Alternating color dots in a checker pattern — red and white, or black and gold, in a structured alternate grid.
The checker trick: it is just the classic grid with alternating colors — same spacing, two colors alternating position. The pattern that reads complex and builds simple.
The Color Pairs Beyond Black and White

The classic pair is the classic — but the dot world extends.
Cream dots on burgundy — the cozy fall-winter pair. The warmth pairing from our thanksgiving nail ideas guide’s palette.
Gold dots on navy — the holiday pair, the dots reading like stars. The metallic dot that pairs with the gold season.
White on every color — the universal dot. White dots work on red, green, blue, burgundy, black — the one bottle that powers every design here.
The tone rule: dots need contrast against the base to read — similar tones make the pattern whisper, opposite tones make it speak. Neither is wrong; the volume is the choice.
The 3 Mistakes That Smudge Every Dot

Mistake 1 — dragging on contact. The press is straight down, straight up. Any sideways movement turns the circle into a comet.
Mistake 2 — too much polish on the tool. A loaded tip deposits blobs; a coated tip deposits dots. Wipe the excess on the foil edge before pressing.
Mistake 3 — topcoating wet dots. Dots need full dry before the topcoat — the topcoat drags soft dots into smears. Dry longer than feels necessary, then seal.
The Dot Evolution — One Technique, Every Season
The pressed-dot method powers designs across the whole year — the technique you learn today is the foundation of everything after.
Thanksgiving dots: the mini pumpkin faces from our pumpkin nails ideas guide are dot builds. Halloween dots: the ghost eyes from our ghost nails guide are two dots and a smile. Christmas dots: the snow dots, the ornament dots, the light strings — all pressed.
Learn the dot once, and every seasonal design becomes a placement exercise. The technique investment that pays every month.
Polka Dot Nails FAQ
How do I do polka dot nails without a dotting tool?
A toothpick tip or bobby pin head — dip in polish, press straight down, lift straight up. The round tool deposits a round dot by geometry, no painting involved. The kitchen-drawer kit costs nothing.
Why are my polka dots smudging?
Three causes: dragging on contact (press straight down and up), too much polish on the tool (wipe the excess first), or topcoating before the dots fully dried. The press method plus patience fixes all three.
What size should polka dots be?
One to two sizes per design — mini 2-3mm dots for classic patterns, micro 1mm dots for texture fields, medium 4-5mm for statement features. Three sizes on one nail reads confetti; two read designed.
Do polka dot nails work on short nails?
Beautifully — micro and mini dots scale down perfectly, and the vertical dot lines from the elongating builds add length visually. Short nails suit the texture fields and accent dots best; dense full grids overwhelm small canvases.
What colors work for polka dot nails?
White dots on any color is the universal pair — red, burgundy, navy, black all host white dots beautifully. The contrast rule decides the volume: opposite tones speak loudly, similar tones whisper. Choose by occasion.
More questions? Ask us on Facebook and we will troubleshoot your dots before the topcoat.

The Circle Was Never Yours to Draw
Four dot sizes, ten designs, and the press method that replaced painting with touching — polka dot nails stop being a failed art project the moment the toothpick replaces the brush.
Dip, press, lift. Repeat with patience, seal with topcoat. And the design that failed you every previous attempt comes out round, evenly spaced, and unexplainably professional.
Save this tutorial to our Pinterest boards so the press method is on your phone when you paint, and complete the dot family with the ghost nails guide and the pumpkin nails ideas collection — every dot design, one technique.
New technique tutorials every week. Stay round, stay pressed! ⚪